Category Archives: Geek

Sweet computer stuff I have found

Swish Fibre

Swish offer residential and business fibre to the premises, otherwise known as FTTP or FTTH.

WORK IN PROGRESS

Network Address Translation

Swish use CGNAT (Wiki), also known as Carrier Grade NAT. In short, CGNAT is used from the ISPs side of the network for IPv4 address translation as the IPv4 pool is exhausting. It works in the same way as NAT at home, allowing multiple IPs to reside behind a single IP.

Draytek have a decent post on ‘what is carrier grade NAT’, Link.

CGNAT has its own reserved IP range between 100.64.0.0 and 100.127.255.255.

We can tell CGNAT is being used by running a trace route, in this example I queried google.com, the first hop returned is my local router, with the next hop returned being 100.64.0.X

Connection settings

The Swish packages come with 2 different routers, Plume and Linksys, or you can use your own. At home I run pfSense on some old hardware that is more then capable of my max speeds and with some extras thrown in.

To connect your own router:
Use the 10Gb RJ45 point on the installed ONT, connect this to the WAN on your own router, ensure the WAN connection is set to DHCP and you are good to go.
Note: This will create a double NAT, but that is fine for many.

Getting out of CGNAT

To get out of the CGNAT network and onto the standard external internal, you will need a static IP. With being provided with a static IP you are given a fixed address outside of the CGNAT pool.

VPNs

Windows Server 2012 R2, Missing DNS Entries, Solved

For some reason, I just couldnt see why it was happening, Windows Server 2012 R2 DNS AD DC dns entries just disappearing! It started with one, I clicked refresh, and they all dissapeared.

Sometimes you just need to go back a couple of steps, and remember that you have selected a Filtered View. It was only when adding a test DNS entry, the system said the record was already added, but where!?

Continue reading Windows Server 2012 R2, Missing DNS Entries, Solved

Raspberry Pi Zero Wireless Issues, Problem Found

Note: written march 2018 but only just published

Using a brand new Raspberry Pi Zero Wireless for the first time, I found the WiFi to be awful.

I used Raspbian Jessie Lite to setup the Pi Zero Wireless with a headless configuration, WiFi details and SSH enabled before the initial boot.

Round 1 – WTFreak!?

Pi unboxed and put into a nice little case for protection, power plugged up…here we go!

On booting the system the Pi connected to my WiFi and I was able to connect via SSH remotely using the hostname. The connection kept on dropping or hanging, which I thought was slightly strange.

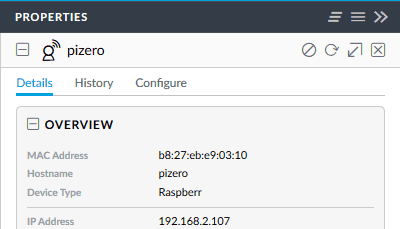
I took a look at my UniFi AP Controller which gives statistics on devices connected, I was shocked to see the strength of the signal between the AP and the Pi flexed from 0% to 5%!?

Continue reading Raspberry Pi Zero Wireless Issues, Problem Found

Raspberry Pi Zero W Quick Setup

Install the OS

Grab the lasted Raspbian Lite OS from https://www.raspberrypi.org/downloads/raspbian/ and burn it to an SD card. Once burnt, unmount and remount the SD card with the PC, this allows you to access the removal drive, now named ‘Boot’.

Enable ssh

SSH is disabled by default. Place a blank text file with the name ssh onto the root of the SD card:

  1. Load a Notepad/++
  2. Save, usual a filetype of any
  3. Name the file ssh and save
  4. Close the file

Add WiFi before boot

To add network info you need to create a file called wpa_supplicant.conf and place that in the root SD card .

  1. Load a Notepad/++
  2. Copy/Past the below code into a new blank file, updating the relivant info.
  3. Save, with a filename of wpa_supplicant.conf ensuring the file type is not .txt
  country=GB
  ctrl_interface=DIR=/var/run/wpa_supplicant GROUP=netdev
  update_config=1

  network={
      ssid="NETWORK-NAME"
      psk="NETWORK-PASSWORD"
  }

ARPIC – Time Check Boot Script

In the event of a power outage, an analogue power socket timer switch will simply turn off.   When then power returns, the unit is not aware of how long the power has been out for and the timer will continue from when the power cut.

If a digital timer is used, on power being restored, the time should be correct with your on/off schedule preserved.

When using a Linux system (Raspberry Pi) and Cron to set a scheduled task, if a power cut occurred within the time an action was supposed to initiate, this window will be missed as when the system power is restored the action event would have passed and won’t be initiated until the next scheduled time.

For the ARPIC or Linux system to act like a 7 day digital timer a script is used on start up to check the time.

Continue reading ARPIC – Time Check Boot Script